
Network setup utility to help locate the network drive on the local network.
Supported Products:
PD-LN2U2SS, PDD-LNU2SS, HY-LN2U2SJS
Supported Operating Systems:
Windows XP, Windows Vista, Windows 7
| File | Description | File size | Last modified |
|---|---|---|---|
| Hydra LAN nettool v1.6 for Windows | 186 kB | Oct 07, 2010 | |
| Pleiades Giga LAN nettool v1.6 for Windows | 506 kB | Oct 07, 2010 | |
| Taurus LAN nettool v1.6 for Windows | 318 kB | Oct 07, 2010 |
- Turn on your network drive and make sure it is connected to the same network as your computer.
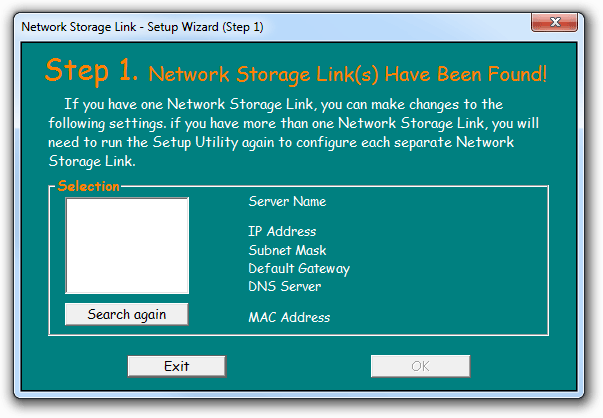
- Start the NetTool utility by double clicking on the EXE file and then click Setup.
- Your network drive will automatically show up in the device list, but if not, make sure the NetTool has access to the network and search again. You might have to configure your firewall or temporarily turn it off.
- Select your device and click OK to start the setup wizard.
- Before you can access the device, you will have to enter the admin password. The default login is admin/admin, so enter admin for the password and click OK to login.
- In step 2, you can define the name for your device and set up the IP configuration. We recommend using the “Automatically obtain an IP address (DHCP)”. When set, click Next to continue.
- In step 3, you can set up the date and time. Select your time zone from the drop down menu, set the date, the time and then click Next to continue.
- In step 4, you can compare your new settings with the previous configuration. If you find a mistake, go back to make changes but if everything is OK, click Save.
- The setup wizard will remind you that the previous settings will now be updated with the new configuration. Click OK to finish the setup wizard.